Showing posts with label ios 4.2.1 jailbroken. Show all posts

Wednesday, February 16, 2011

PwnageTool 4.2 With iOS 4.2.1 Untethered Jailbreak Released!


The iPhone Dev-Team has released PwnageTool 4.2 to create a custom IPSW that can perform an untethered jailbreak on iOS 4.2.1.

-
What's in a name? Well in the case of an HFS volume name on iOS, an untether exploit — as the Chronic Dev Team revealed last week with an untether for the 4.2.1 jailbreak, which had previously been a tethered JB for most recent devices since 4.2.1's release in November. With their permission, we've incorporated their 4.2.1 "feedface" untether into today's PwnageTool 4.2. This means iPhone unlockers can safely restore to a custom 4.2.1 pre-jailbroken IPSW and retain their current baseband and unlock.

PwnageTool also supports all the other 4.2.1 devices other than iPod touch 2G:
● iPhone3G
● iPhone3GS
● iPhone4
● iPhone4-Verizon
● iPod touch 3G
● iPod touch 4G
● iPad
● AppleTV 2G

PwnageTool also includes two very recent improvements to the 4.2.1 JB: iBooks was just fixed by @comex and @pushfix last night so that it works as intended on DRMed books, and the wifi problem on AppleTV 2G was fixed by @nitotv, @DHowett, and @saurik. Both of these fixes will also be available in upcoming Cydia package updates, so if you're already jailbroken you can wait for those updates rather than restore and jailbreak again.

The various components to the 4.2.1 untether (including a second exploit involving Mach-o headers) were worked out by 0naj, posixninja, and pod2g, and a nice writeup by 0naj is available on the wiki. The actual injection method uses geohot's limerain exploit for most devices. And even though 4.3 is just around the corner, the exploit used has already been closed in the latest 4.3 betas, so it made sense for the 4.2.1 untether to be released when it was. It also appears that a security researcher named @i0n1c has a 4.3 untether ready for when Apple releases the final 4.3 FW, so it may not be a long wait at all with 4.3!
-

You can download the new version from here(mirror). We will be updating our PwnageTool tutorial shortly!


*thanks iclarified*

Our new Forum is now open here or on the top tabs marks Forums, please register and post..

For the latest limera1n, rubyra1n, and all tech stories, follow us on Twitter at
@iphonepixelpost or @limerain_com
www.iPodSets.com
- Posted using my iPhone 4

Saturday, February 5, 2011

iPhone | How to Jailbreak Your iPhone 3GS, iPhone 4, iPad, iPod Touch Using Greenpois0n (Windows)


These are instructions on how to jailbreak your iPhone 3GS and iPhone 4 using Greenpois0n for Windows. Greenpois0n supports the iOS 4.1 and iOS 4.2.1 firmware. Use Limera1n if you want to jailbreak iOS 4.0, iOS 4.0.1, iOS 4.0.2.

Remember: Do not update to iOS 4.2.1 if you need the unlock. Ultrasn0w does not support that baseband yet. The only exception is the iPhone 4. You can update to iOS 4.2.1 without upgrading your baseband by following this tutorial.

Step One
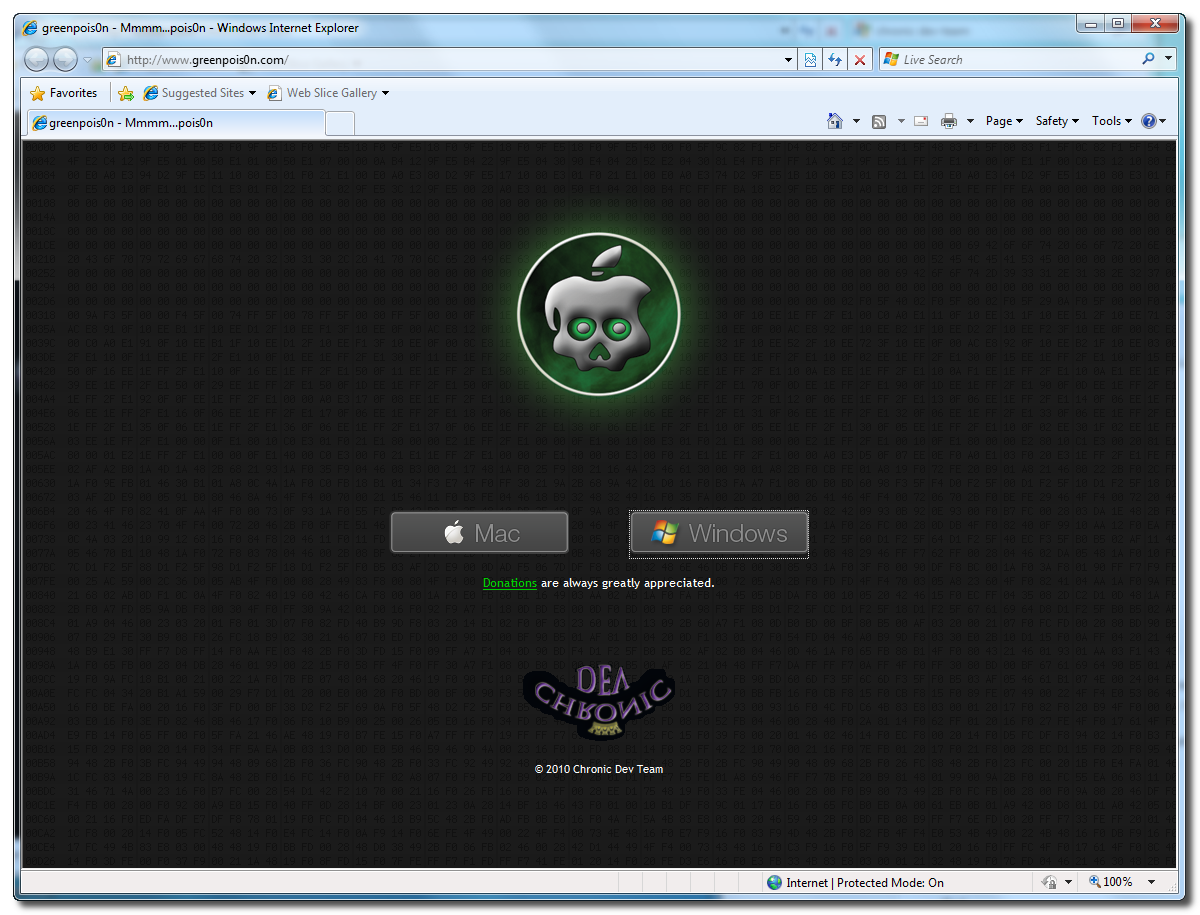
Open your web browser of choice and navigate to http://www.greenpois0n.com. Click theWindows link at the bottom of the screen.


Step Two
When prompted save the download to your desktop


Step Three
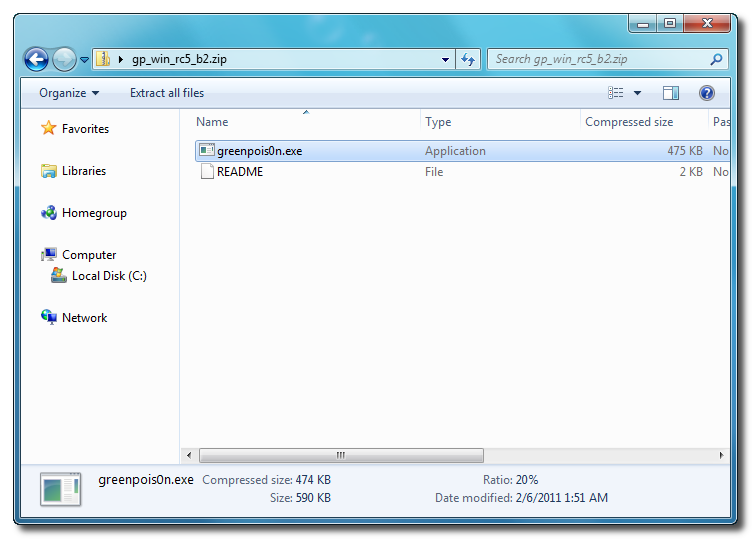
Double click the downloaded gp_win_rc5_b2.zip file then drag the greenpois0n.exe file to the desktop. Double greenpois0n.exe from the desktop to launch the application


Step Four
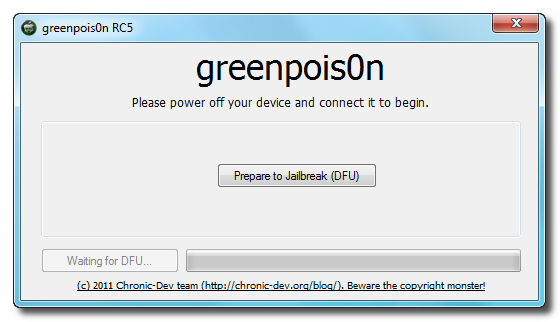
Power off your iPhone then click the large Prepare to Jailbreak (DFU) button


Step Five
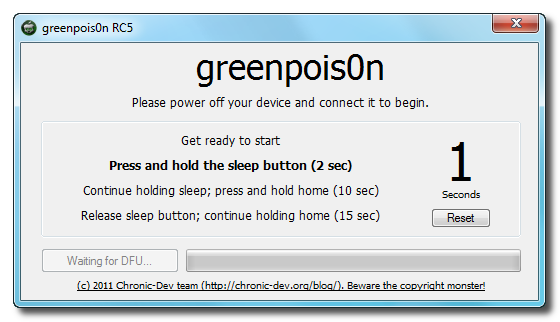
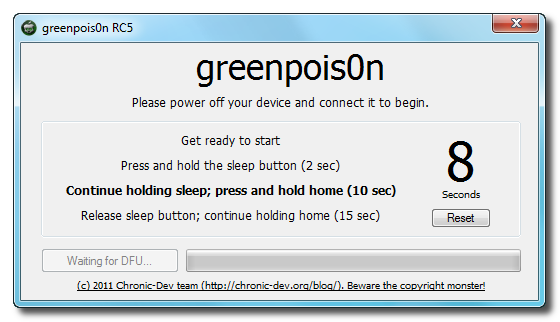
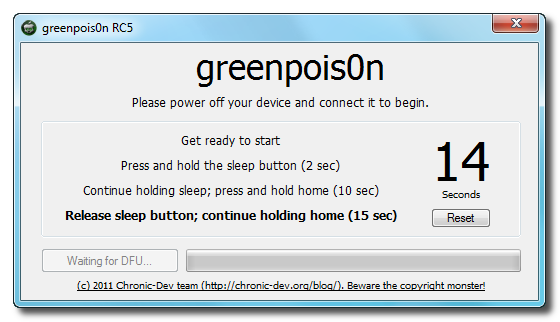
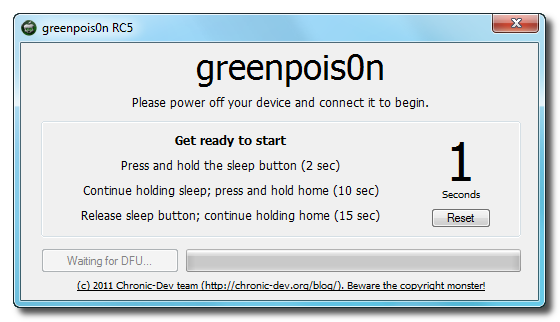
You will now be instructed on how to place your iPhone into DFU mode. You can get help with thishere.


You will be asked to press and hold the sleep button for 2 seconds.


Continue holding sleep; press and hold home for 10 seconds.


Release sleep button; continue holding home for 15 seconds.


Step Six
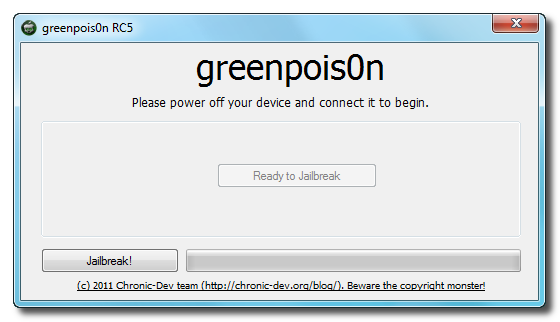
Once your iPhone is successfully in DFU mode you may click the Jailbreak button.


Step Seven
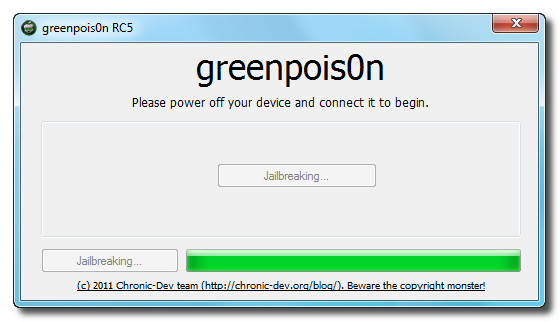
Greenpois0n will now jailbreak your device


Step Eight
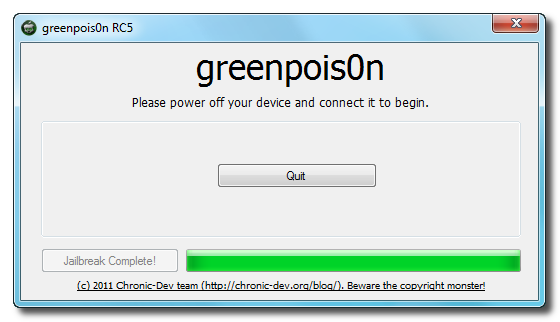
Click the Quit button once the software application has completed.


You'll notice some verbose mode text scrolling on your device.

Step Nine
After the iPhone restarts you'll notice a new Loader application on your Springboard. Press to launch it.


Step Ten
Press to select Cydia then press the large Install Cydia button that appears.


Step Eleven
Once Cydia has installed successfully you can remove Loader by pressing the Options button then the large red Remove Loader.app button.


Step Twelve
Restart your iPhone then run Cydia. Let it do all the necessary updates then follow our Unlocktutorial if possible for your device.


***A big thanks goes everyone who made this jailbreak possible.Our new Forum is now open
thanks iclarified
here or on the top tabs marks Forums, please register and post..  For the latest limera1n, rubyra1n, and all tech stories, follow us on Twitter at @iphonepixelpost or @limerain_com www.iPodSets.com - Posted using my iPhone 4

Greenposi0n windows download mirrors here!

Here are a few mirrors you can get a copy from.

Mirror1

Mirror2

Enjoy!!

Please comment on and success!!

If anyone would like to submit a custom tutorial for the windows version of greenpois0n please send us an email to limerain.com@gmail.com

Our new Forum is now open here or on the top tabs marks Forums, please register and post..

For the latest limera1n, rubyra1n, and all tech stories, follow us on Twitter at
@iphonepixelpost or @limerain_com
www.iPodSets.com
- Posted using my iPhone 4

Sunday, January 23, 2011

iPhone Dev-Team Ports Monte Untether Back to iOS 4.1 SHSH Blobs


The iPhone Dev-Team has successfully ported their Monte untether back to the iOS 4.1 kernel.

Previously to untether your jailbreak using Monte you needed to have the iOS 4.2b3 SHSH blobs saved which was developer only. Now you will only need your iOS 4.1 SHSH blobs. The team is also working on porting Monte forward to iOS 4.3...

Ported Monte back to 4.1 kernel (SHSH blobs). Next step: porting it forward to 4.3beta!

MuscleNerd notes that the beauty of Monte is it doesn't expose any new exploits :) It makes the entire "wait until next FW" concern moot. Think of Monte as a "green" jailbreak. It recycles (for example) 4.1's exact JB exploit on 4.2.1 :) Waste no exploits.

We'll let you know when RedSn0w is updated with the new capabilities.

The Chronic Dev-Team is also packaging up an untether for iOS 4.2.1 that will not require SHSH Blobs.

Stay tuned for more information.


*thanks iclarified*

Our new Forum is now open here or on the top tabs marks Forums, please register and post..

For the latest limera1n, rubyra1n, and all tech stories, follow us on Twitter at
@iphonepixelpost or @limerain_com
www.iPodSets.com
- Posted using my iPhone 4
Thursday, January 20, 2011

How to Jailbreak Your Apple TV 2G Using Seas0nPass for (Mac) [4.2.1]


These are instructions on how jailbreak your second generation Apple TV using Seas0nPass.

**Currently, only a tethered jailbreak is possible on the 4.2.1 firmware***

Step One
Download the latest version of SeasonPass from here.

Step Two
Double click to extract the archive you downloaded. Then double click the extract application to launch it.


Step Three
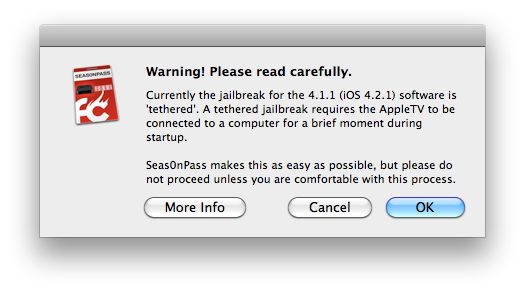
Click OK to continue pass the tethered jailbreak warning.


Step Four
You will be asked to sign in as an Administrator. Enter your username and password then click the OKbutton.


Step Five
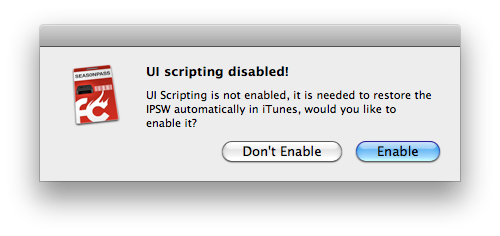
You will be asked to enable UI Scripting. Click the Enable button.


Step Six
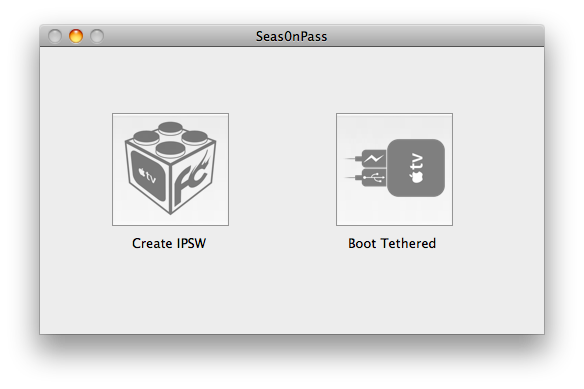
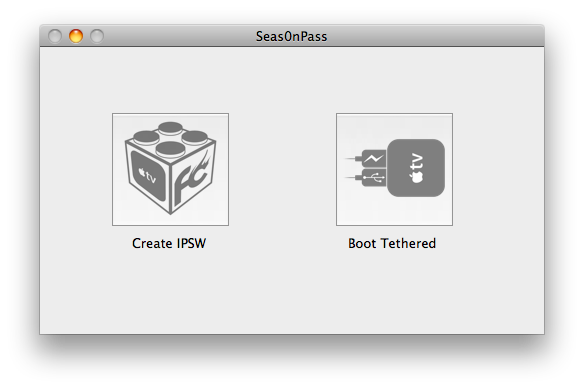
Click the Create IPSW button from the main screen.


Step Seven
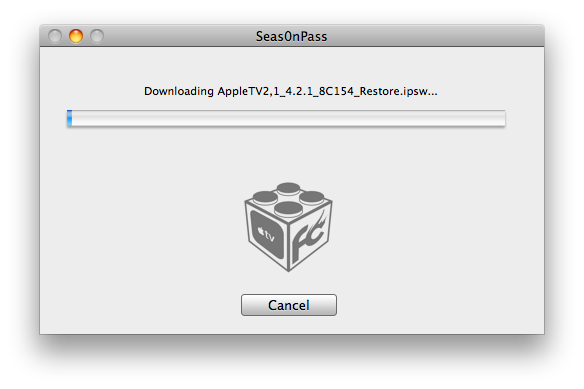
Seas0nPass will now download the latest Apple TV firmware file


Step Eight
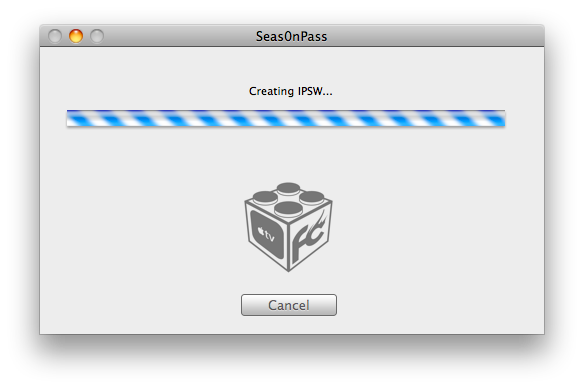
Seas0nPass will create a custom IPSW file for you.


Step Nine
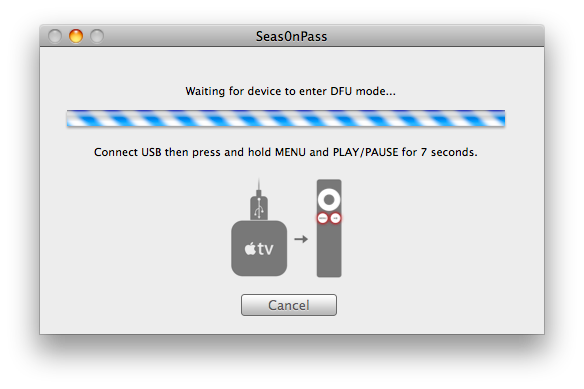
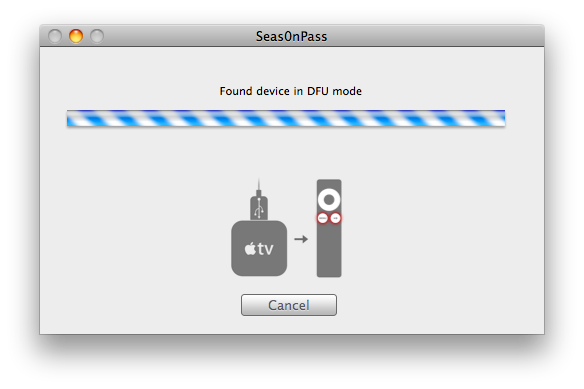
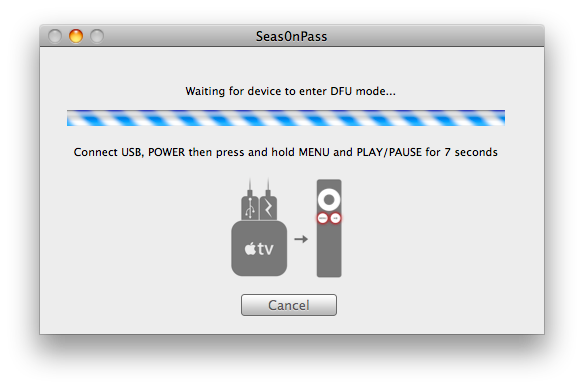
Once your custom IPSW file has been created, Seas0nPass will ask you to connect the Apple TV to your computer via a micro-USB cable and use the remote to put it into DFU mode by holding MENU and PLAY/PAUSE for 7 seconds. The power cable should be unplugged during this process.


Step Ten
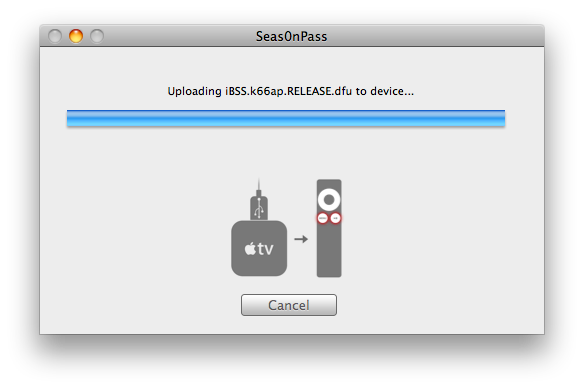
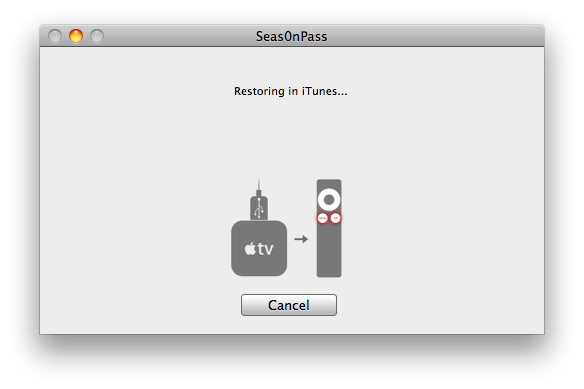
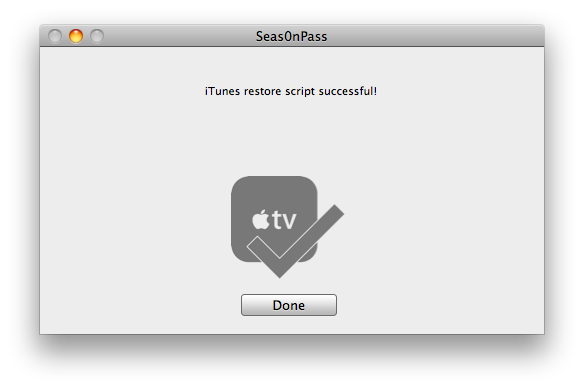
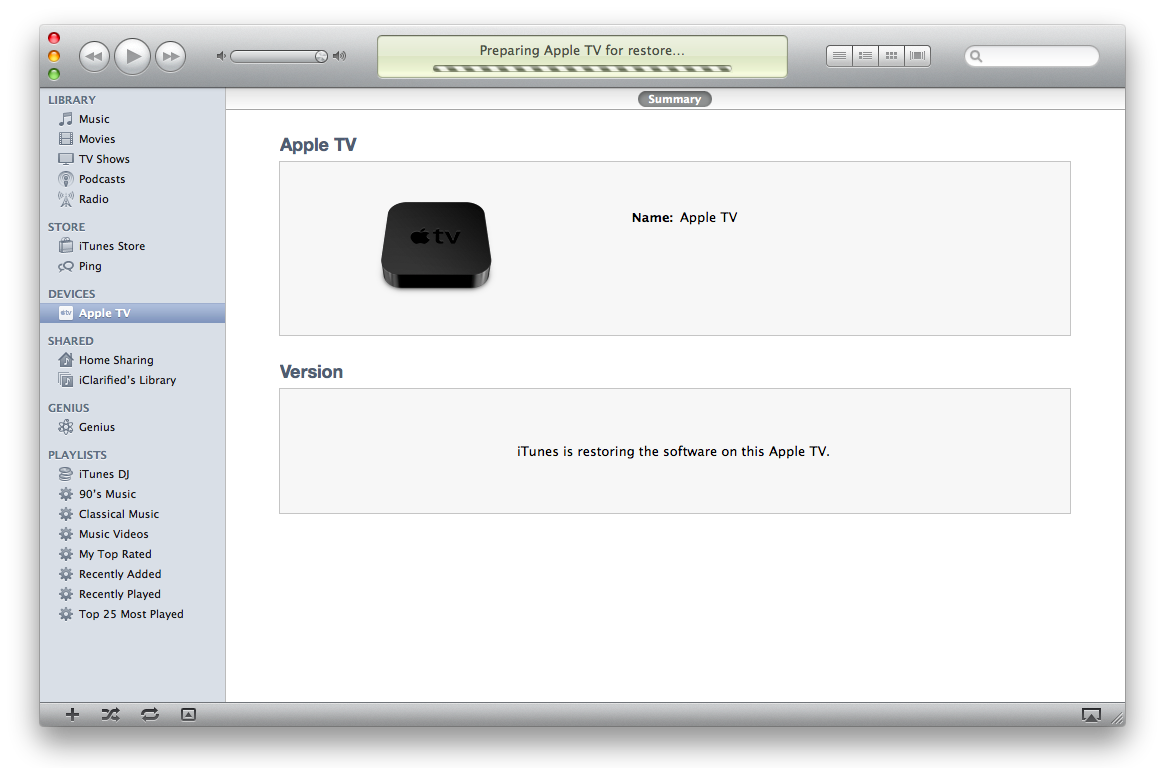
Once your Apple TV has been detected in DFU mode, Seas0nPass will upload some files, automatically launch iTunes, and beginning restoring to the new firmware.


BOOT TETHERED
To boot your Apple TV you will need to follow these instructions.

Step One
Launch Seas0nPass by double clicking its icon.


Step Two
Select Boot Tethered from the main menu.


Step Three
Connect the Apple TV to the computer via USB, plug it into the power outlet, and hold MENU and PLAY/PAUSE on the Apple TV remote for 7 seconds.


Step Four
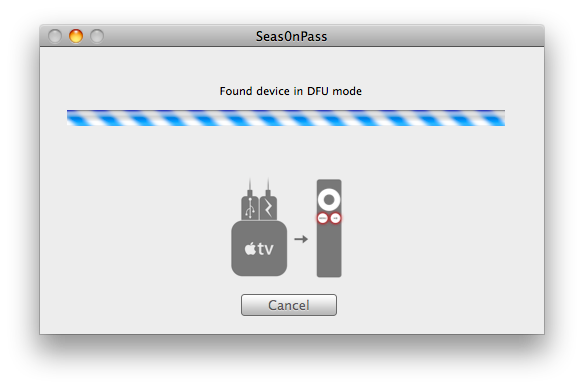
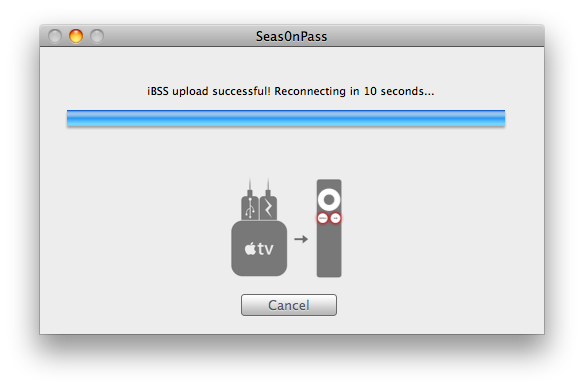
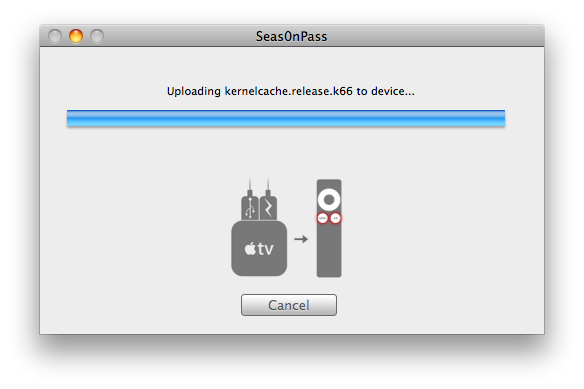
Seas0nPass will detect the device in DFU mode and begin the boot process.


Step Five
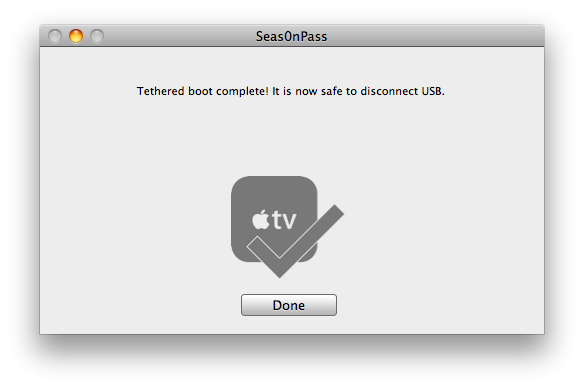
Once the tethered boot is complete you can remove the USB cable and connect the HDMI cable to begin using your jailbroken device!


*thanks iclarified*

Our new Forum is now open here or on the top tabs marks Forums, please register and post..

For the latest limera1n, rubyra1n, and all tech stories, follow us on Twitter at
@iphonepixelpost or @limerain_com
www.iPodSets.com
- Posted using my iPhone 4

Sunday, January 9, 2011

iPhone Dev-Team Updates RedSn0w to Fix Bluetooth Issues With Untether


The iPhone Dev-Team has updated RedSn0w to fix Bluetooth issues with the 'Backup Plan' untether.

The fifth beta is now available (testers ONLY please!). Bluetooth is now working (and any sandbox-related issues should be resolved too). Please do not pirate the 4.2b3 IPSW! Only those enrolled in the iPhone Developer program have legitimate access to that IPSW.

There is actually a Windows version of beta5, but it’s excruciatingly slow compared to the Mac version because it’s forced to use files on your hard drive instead of RAM while it’s processing the very large IPSW images. It really is very very painfully slow, so we probably won’t be releasing it for testing purposes unless it can be sped up somehow.

You can download RedSn0w .0.7b5 from here. You can find instructions on how to use this version of RedSn0w to untether here.


*thanks iclarified*

Our new Forum is now open here or on the top tabs marks Forums, please register and post..

For the latest limera1n, rubyra1n, and all tech stories, follow us on Twitter at
@iphonepixelpost or @limerain_com
www.iPodSets.com
- Posted using my iPhone 4
Monday, January 3, 2011

How to Quickly Boot Your Tethered Jailbroken iPhone (Windows)


These are instructions on how to quickly boot your tethered jailbroken iPhone using RedSn0w for Windows.

Step One
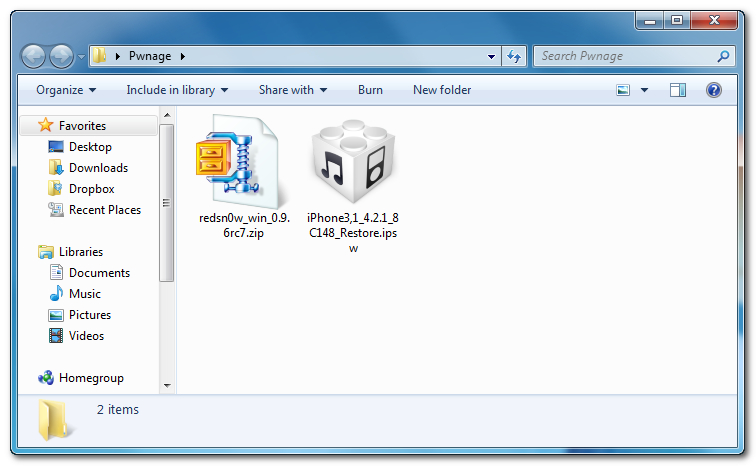
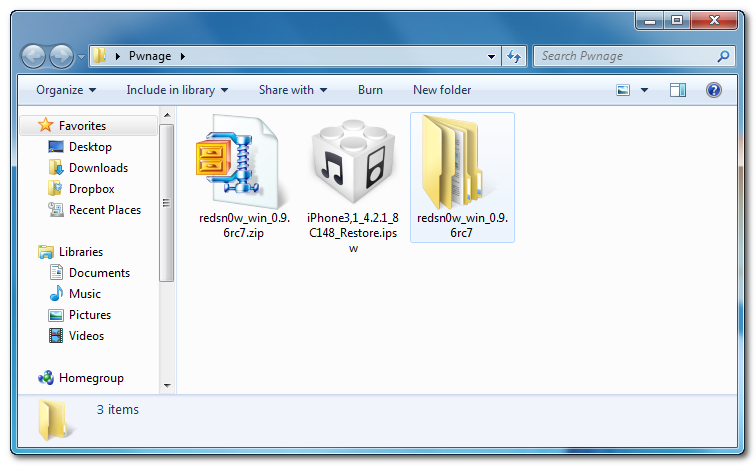
Create a Pwnage folder on your Desktop and in it place:
● RedSn0w 0.9.6rc7
● Your iPhone firmware ipsw (download here)


Step Two
Double click the RedSn0w archive to extract it.


Step Three
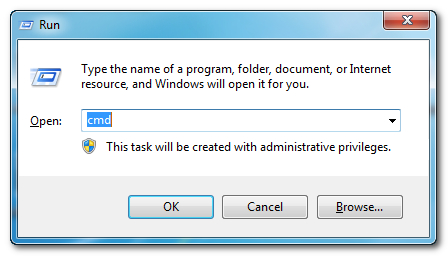
Press the Windows and R key then input cmd and click OK to launch the Command Prompt.


Step Four
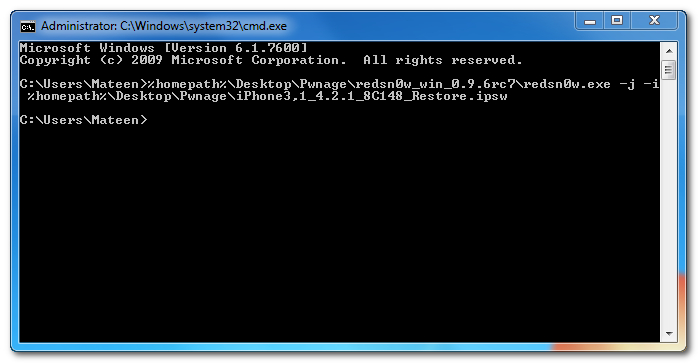
Input the following command for devices with the new bootrom:

%homepath%\Desktop\Pwnage\redsn0w_win_0.9.6rc7\redsn0w.exe -j -i %homepath%\Desktop\Pwnage\iPhone3,1_4.2.1_8C148_Restore.ipsw

Input the following command for devices with the old bootrom (iPod 2G, iPhone 3GS):
%homepath%\Desktop\Pwnage\redsn0w_win_0.9.6rc7\redsn0w.exe -j -o -i %homepath%\Desktop\Pwnage\iPhone2,1_4.2.1_8C148a_Restore.ipsw

**Important: remember to change the filename to the filename of the ipsw you downloaded in Step One.


Step Five
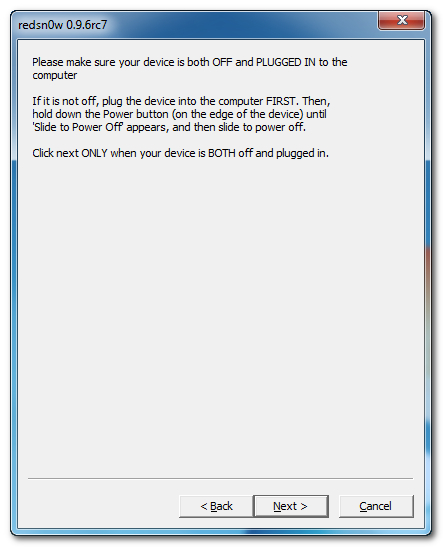
RedSn0w will now open, instruct you on placing your iPhone into DFU mode if it isn't already, and boot your device.


*thanks iclarified*

Our new Forum is now open here or on the top tabs marks Forums, please register and post..

For the latest tech stories, follow us on Twitter at
@iphonepixelpost or @limerain_com
www.iPodSets.com
- Posted using my iPhone 4
How to Quickly Boot Your Tethered Jailbroken iPhone (Mac)

These are instructions on how to quickly boot your tethered jailbroken iPhone using RedSn0w for Mac

Step One
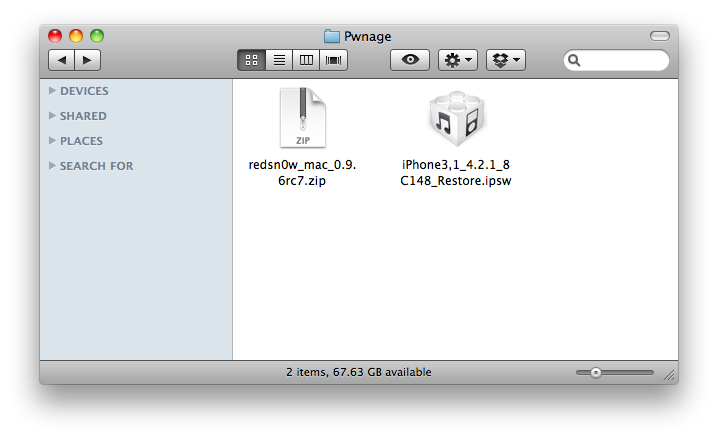
Create a Pwnage folder on your Desktop and in it place:
● RedSn0w 0.9.6rc7
● Your iPhone firmware ipsw (download here)


Step Two
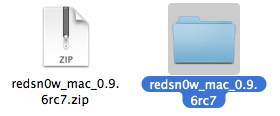
Double click the RedSn0w archive to extract it.


Step Three
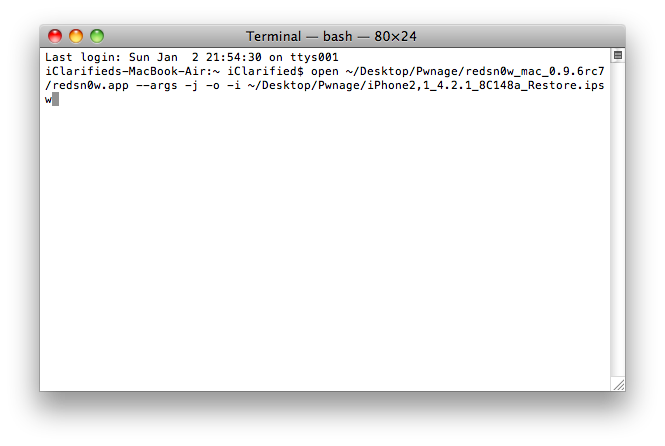
Launch Terminal from Applications:Utilities folder.


Step Four
Input the following command for devices with the new bootrom:

open ~/Desktop/Pwnage/redsn0w_mac_0.9.6rc7/redsn0w.app --args -j -i ~/Desktop/Pwnage/iPhone3,1_4.2.1_8C148_Restore.ipsw

Input the following command for devices with the old bootrom (iPod 2G, iPhone 3GS):
open ~/Desktop/Pwnage/redsn0w_mac_0.9.6rc7/redsn0w.app --args -j -o -i ~/Desktop/Pwnage/iPhone2,1_4.2.1_8C148a_Restore.ipsw

**Important: remember to change the filename to the filename of the ipsw you downloaded in Step One.


Step Five
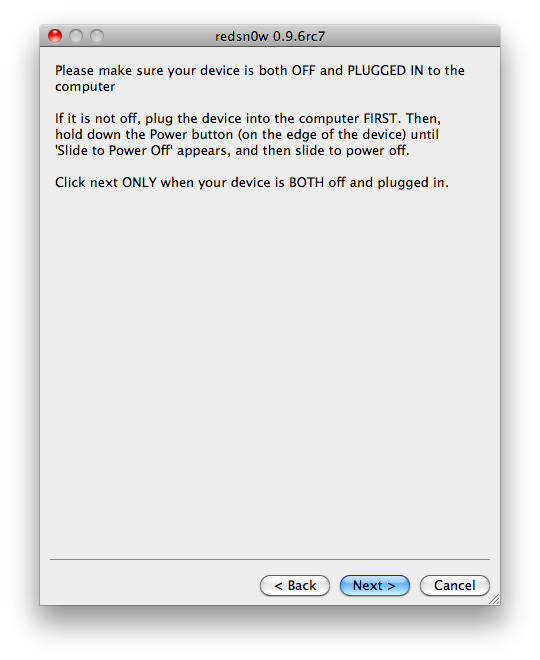
RedSn0w will now open, instruct you on placing your iPhone into DFU mode if it isn't already, and boot your device.

*thanks iclarified*

Our new Forum is now open here or on the top tabs marks Forums, please register and post..

For the latest tech stories, follow us on Twitter at
@iphonepixelpost or @limerain_com
www.iPodSets.com
- Posted using my iPhone 4