This is a Tutorial for jailbreaking the iPhone 4 on or for iOS 4.3.2 using PwnageTool for Mac OSX
and for those who still have the 01.59.00 baseband you will preserve your baseband for an unlock with ultrasn0w. Ultrasn0w unlock tutorial can be found here
This tutorial can be used for all devices compatible with pwnagetool 4.3.2 however each device requires a deferent size partition, for device specific tutorials please look here
Step 1
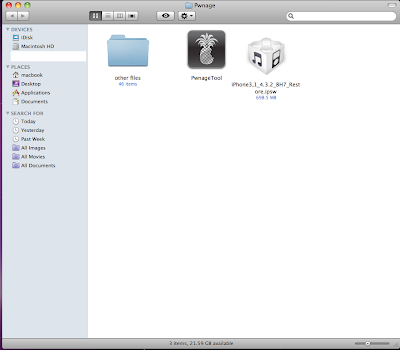
Make a folder on your desktop called Pwnage , this is where you will place all of the files you will need to jailbreak your iPhone. Now download Pwnagetool 4.3.2 from here

Now download the iOS Firmware 4.3.2 and place it into the Pwnage file Link below
4.3.2 (iPhone 4 GSM) iPhone3,1_4.3.2_8H7_Restore.ipsw
 *Note try to download the firmware file with chrome or firefox because safari sometimes auto extracts the firmware files.
Step 2
Click Twice on the downloaded Pwnagetool file, and drag the icon into the Pwnage folder


Now launch PwnageTool
Press ok and continue

Step 3
Select Expert mode from the top menu

Step 4
Select your Device (in this tutorial the iPhone 4) you will then see a check mark appear then click the blue arrow.
 Step 5
Now you have to select the Correct iPSW file for your device, click the Browse for ipsw...


Step 6
Now you will see the main menu
Select General and click the blue arrow
 In General Settings you will be able to chose the size of your partition and or whether you need to activate the iPhone or not(Only check Activate if you will not be using an official carrier, for example at&t in the USA ) and click the blue arrow.

Now you will be in the Cydia settings page, here you will be able to download and include any packages into the custom ipsw...
 ***NOTE DON'T SELECT CYDIA INSTALLER OR YOUR CYDIA MAY CRASH RANDOMLY, YOU CAN SELECT IT IN THE NEXT WINDOW...
 Now you can check the Cydia installer and continue to the next step

Step 7
Now you are almost done, you will be back at the main menu.
Now select Build, when you see a green check next to build then click the blue arrow
 Step 8
Now you can save the custom ipsw file, place it into the Pwnage folder.

Now you will see this screen, it means that pwnageTool is building your custom ipsw file so that you can update your iPhone, jailbreak it, and add the custom packages you selected all at the same time.
 ***Note this is a full restore, meaning that all of your data that wasn't properly backed up in itunes will be lost for ever! please sync your iPhone to itunes before you restore your iPhone with this tutorial...
Building the ipsw file may take anywhere from 3mins to 10mins please be patient..
You will be asked to log in to create the ipsw file, type in your password and click ok
Step 9
When PwnageTool is done building your custom ipsw file you will be asked to connect your iphone and follow the step to place it into dfu mode
Follow the steps bellow!


Step 10
Now open iTunes and hold the Alt/Option and click Restore

Step 11
Go to the Pwnage folder through the window that opens and select the custom ipsw file you just created and select Choose

Step 12
Now iTunes will restore, and jailbreak your iPhone, this may take up to 10 minutes.
When iTunes is done your iPhone will start up on its own with firmware 4.3.2 jailbroken and your baseband preserved for those who want to unlock.
**Thank You to the iPhone Dev-Team, I0nic and all involved in the creation of this jailbreaking tool.
Tutorial Written By iP3
Our new Forum is now open here or on the top tabs marks Forums, please register and post.. For the latest limera1n, rubyra1n, and all tech stories, follow us on Twitter at @iphonepixelpost or @limerain_com www.iPodSets.com - Posted using my iPhone 4
and for those who still have the 01.59.00 baseband you will preserve your baseband for an unlock with ultrasn0w. Ultrasn0w unlock tutorial can be found here
This tutorial can be used for all devices compatible with pwnagetool 4.3.2 however each device requires a deferent size partition, for device specific tutorials please look here
Step 1
Make a folder on your desktop called Pwnage , this is where you will place all of the files you will need to jailbreak your iPhone. Now download Pwnagetool 4.3.2 from here
Now download the iOS Firmware 4.3.2 and place it into the Pwnage file Link below
4.3.2 (iPhone 4 GSM) iPhone3,1_4.3.2_8H7_Restore.ipsw

Step 2
Click Twice on the downloaded Pwnagetool file, and drag the icon into the Pwnage folder

Drag and Drop the PwnageTool


Now launch PwnageTool
Press ok and continue

Step 3
Select Expert mode from the top menu

Step 4
Select your Device (in this tutorial the iPhone 4) you will then see a check mark appear then click the blue arrow.

Now you have to select the Correct iPSW file for your device, click the Browse for ipsw...

Now find the firmware file for your device and click open

Step 6
Now you will see the main menu
Select General and click the blue arrow


Now you will be in the Cydia settings page, here you will be able to download and include any packages into the custom ipsw...


Step 7
Now you are almost done, you will be back at the main menu.
Now select Build, when you see a green check next to build then click the blue arrow

Now you can save the custom ipsw file, place it into the Pwnage folder.

Now you will see this screen, it means that pwnageTool is building your custom ipsw file so that you can update your iPhone, jailbreak it, and add the custom packages you selected all at the same time.

Building the ipsw file may take anywhere from 3mins to 10mins please be patient..
You will be asked to log in to create the ipsw file, type in your password and click ok
Step 9
When PwnageTool is done building your custom ipsw file you will be asked to connect your iphone and follow the step to place it into dfu mode
Follow the steps bellow!


if you get an error try again don't restore your iPhone until you get the DFU confirmation page


Step 10
Now open iTunes and hold the Alt/Option and click Restore

Step 11
Go to the Pwnage folder through the window that opens and select the custom ipsw file you just created and select Choose

Step 12
Now iTunes will restore, and jailbreak your iPhone, this may take up to 10 minutes.
When iTunes is done your iPhone will start up on its own with firmware 4.3.2 jailbroken and your baseband preserved for those who want to unlock.
**Thank You to the iPhone Dev-Team, I0nic and all involved in the creation of this jailbreaking tool.
Tutorial Written By iP3
Our new Forum is now open here or on the top tabs marks Forums, please register and post.. For the latest limera1n, rubyra1n, and all tech stories, follow us on Twitter at @iphonepixelpost or @limerain_com www.iPodSets.com - Posted using my iPhone 4
No comments:
Post a Comment